Get Started on Google Cloud
This tutorial will show you how to start TigerGraph from an image on Google Cloud.
Deploying Your Instance
-
Go to Google Cloud Marketplace and search for "TigerGraph Enterprise Edition". Choose the latest edition to access the most up-to-date features.
-
Click Launch.
-
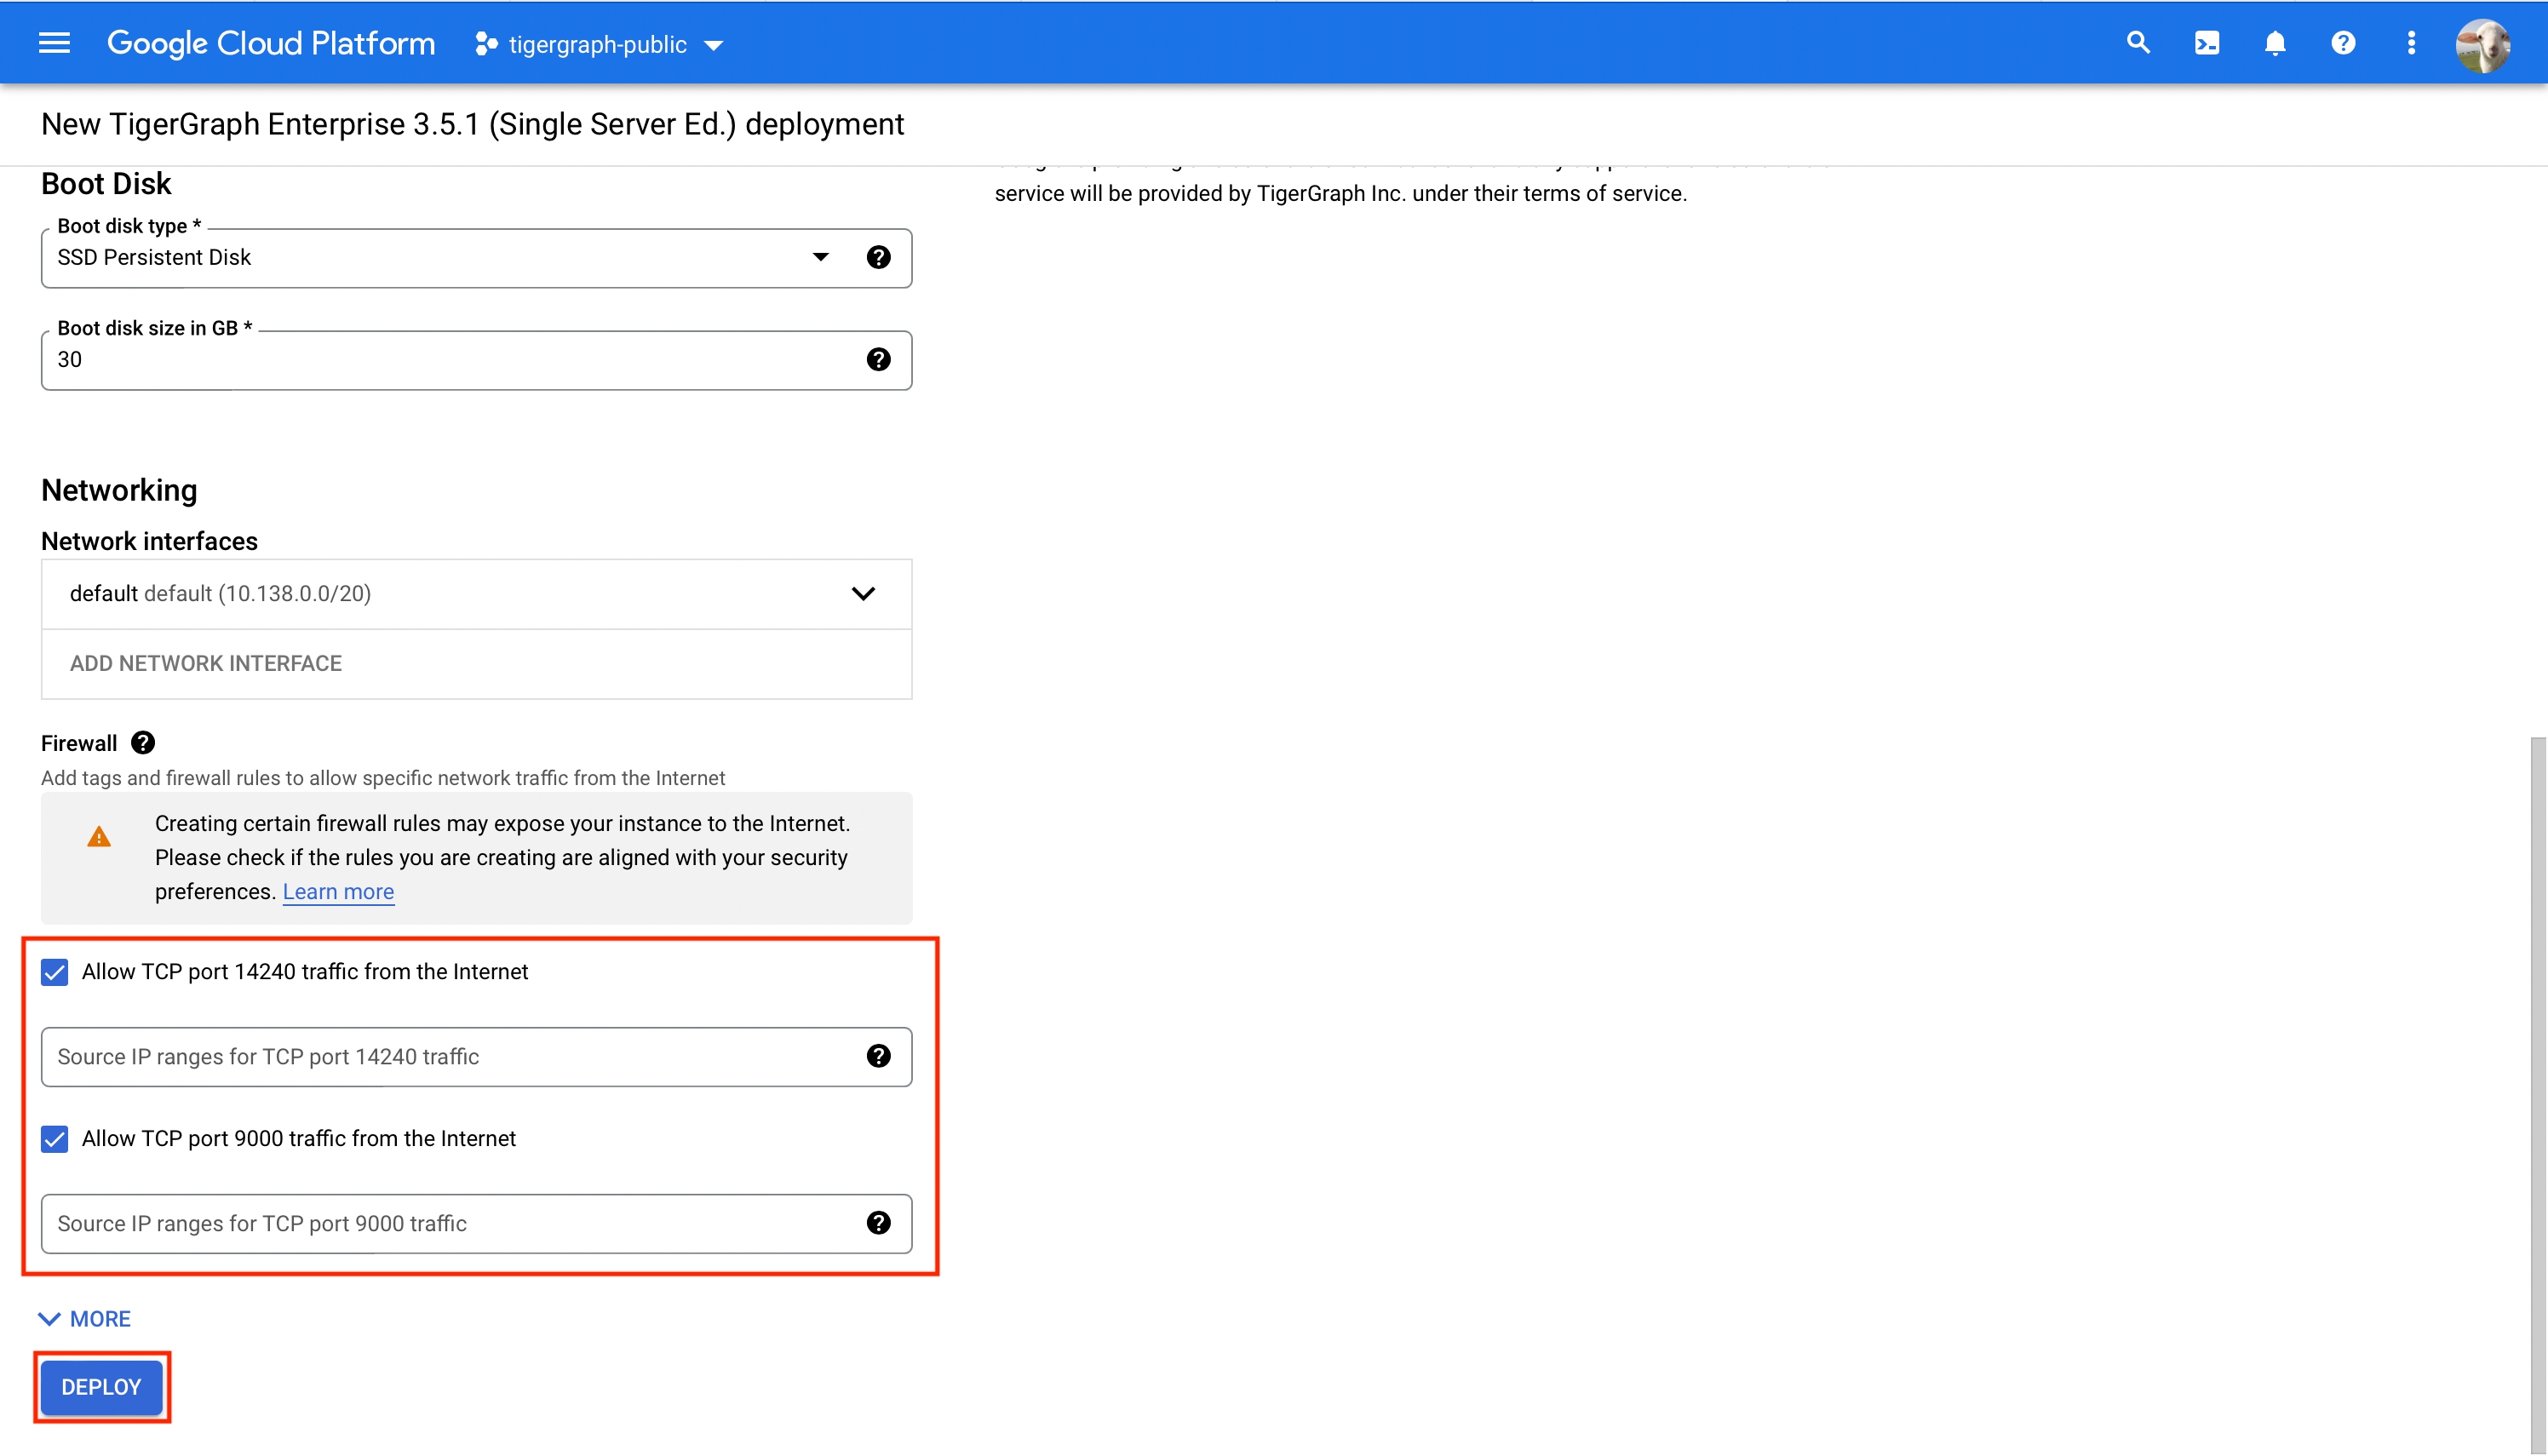
Review the default settings and see if they fit your needs. When ready, click Deploy.
-
The instance type needs to have at least 4 CPUs and 16GB RAM for TigerGraph to work properly.
-
You must allow internet traffic for TCP port 14240 if you want to access GraphStudio. For more about GraphStudio, see the GraphStudio UI Guide.
-
You must allow internet traffic for TCP port 9000 if you want to use TigerGraph’s REST API (this includes configuring the GSQL client on a remote machine).
-
-
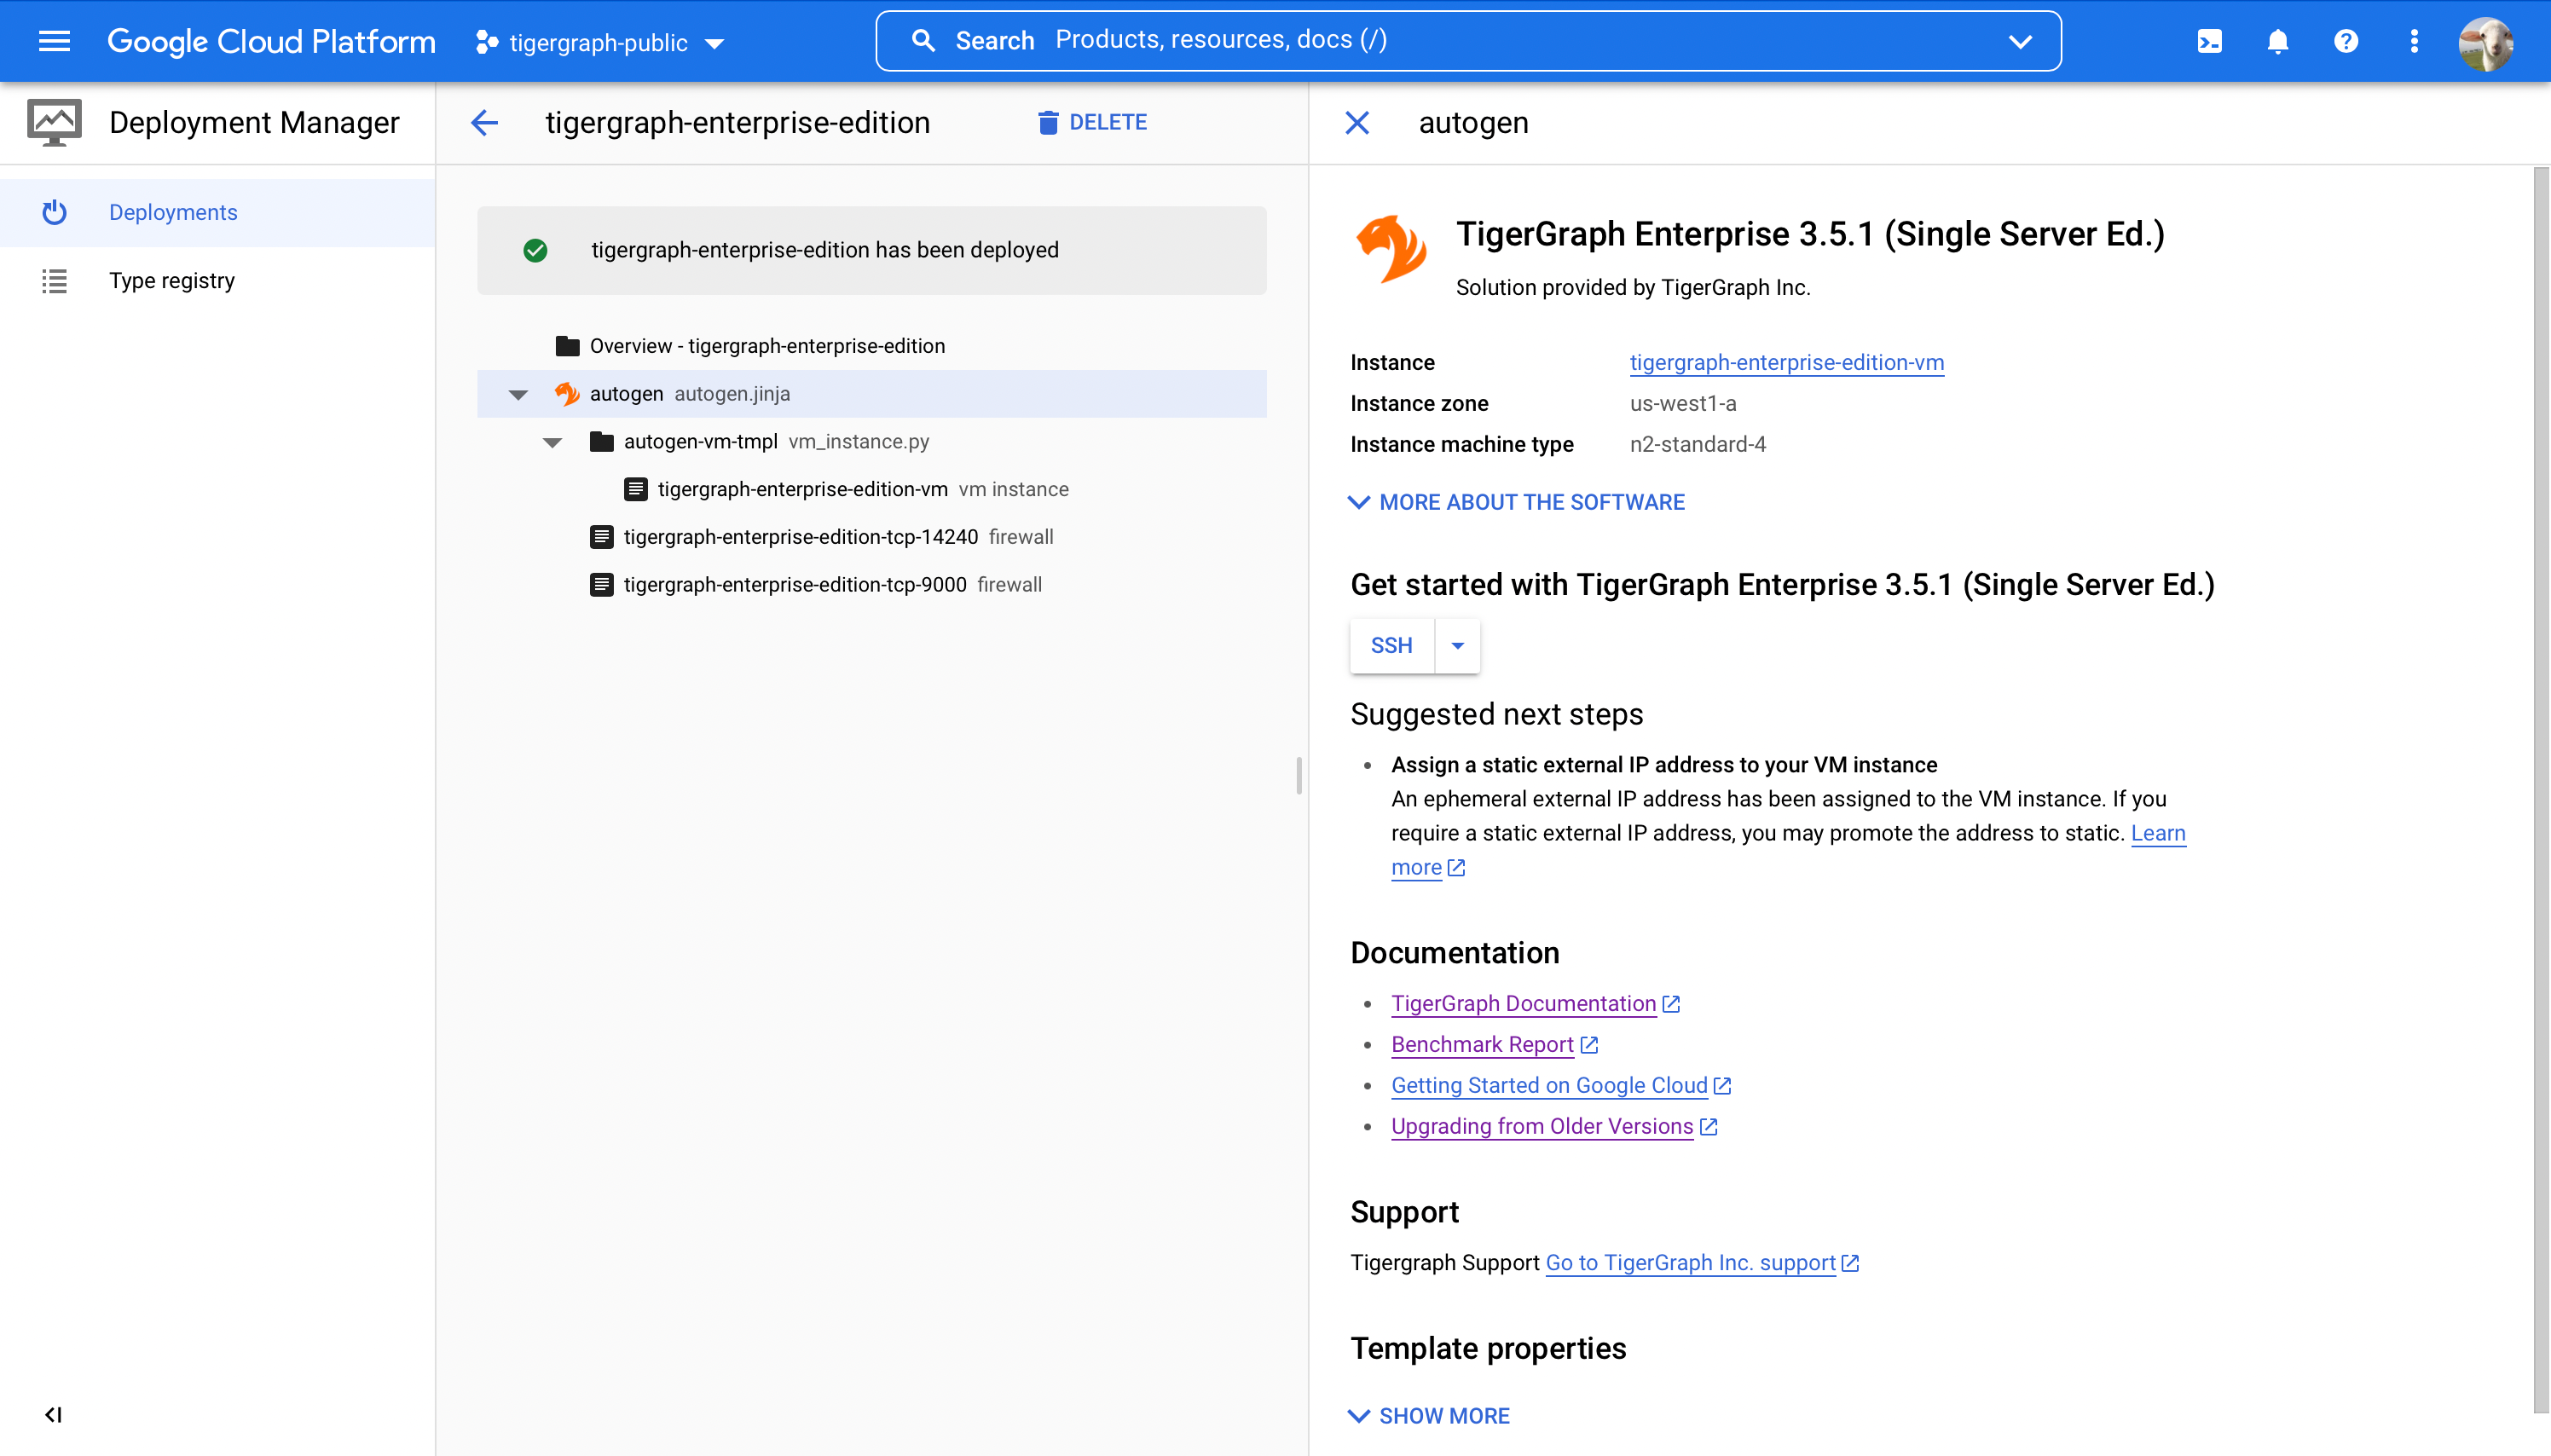
That’s it! The TigerGraph instance has been successfully deployed on Google Cloud.
Starting TigerGraph on Your Instance
-
Log into the instance and switch to user
tigergraphusing the following command:$ sudo su - tigergraph -
Run the following command to check the current status of TigerGraph. The services "ADMIN", "CTRL", "ETCD", "IFM", "KAFKA", and "ZK" are started automatically and are online at this point. If any of them are down, please wait for 30 to 60 seconds and check the status again.
gadmin status.png)
-
Run the following command to start TigerGraph:
$ gadmin start -
Check the status again. All services are online at this point. It is normal for GPE and GSE to be in warmup when the database is empty.
$ gadmin status -
You have successfully started TigerGraph on your cloud instance.
.png)